Quick & Easy Refrigerator Pickles: 10-Minute Homemade Recipe
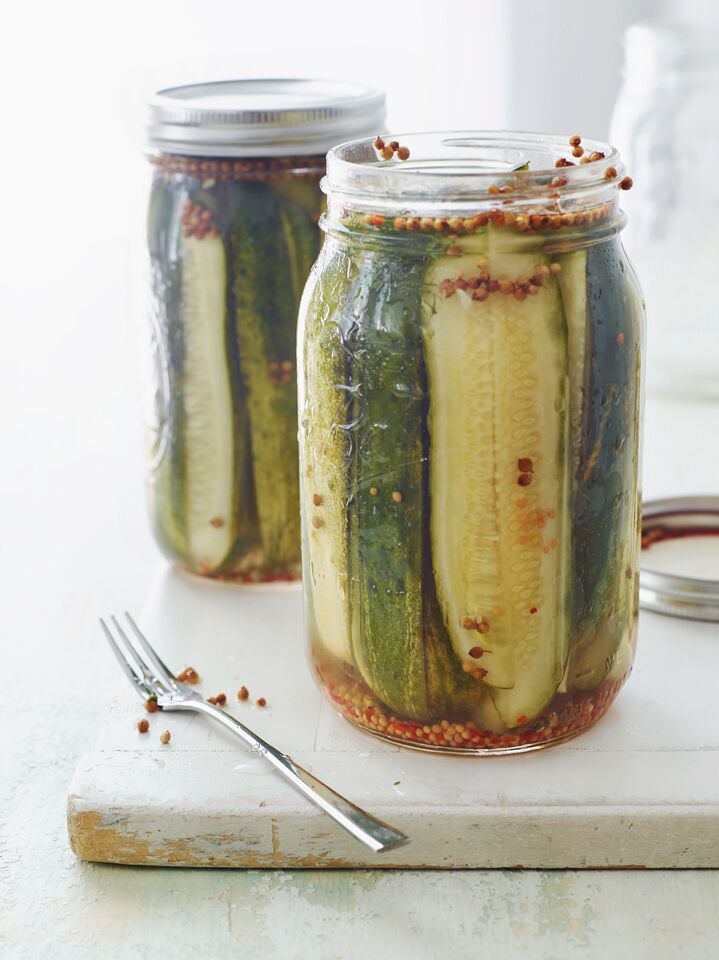
Are you craving that satisfying crunch and zesty tang of a perfect pickle, but intimidated by the complexities of traditional canning? Imagine whipping up a batch of incredibly fresh, crisp, and flavorful homemade pickles in just 10 minutes of active prep time. Sounds like a dream, right? Welcome to the wonderful world of
refrigerator pickles – the ultimate beginner-friendly solution for anyone looking to enjoy the deliciousness of homemade without the fuss.
Why Refrigerator Pickles? The No-Canning Genius
The appeal of
refrigerator pickles lies in their sheer simplicity and speed. Unlike conventional canning, which demands specialized equipment, precise sterilization, and a significant time commitment, refrigerator pickles require none of that. This method sidesteps the boiling water baths and sealing rituals entirely, making it accessible to even the most novice home cooks.
This ease is particularly brilliant during the peak of cucumber season. While fresh cucumbers are abundant and at their crispest, the summer heat often makes the thought of boiling pots of water for canning utterly unappealing. Refrigerator pickles offer a refreshing alternative: a quick brine, a handful of fresh ingredients, and a sealed jar in the fridge. That's it! You get to harness the vibrant flavors of peak-season produce without breaking a sweat, ensuring your pickles retain their natural crispness and bold flavor. It's truly a game-changer for anyone who loves that snappy texture and bright taste.
The 10-Minute Marvel: Your Quick & Easy Refrigerator Pickle Recipe
Get ready to transform simple cucumbers and onions into a culinary delight with minimal effort. This foundational recipe is incredibly forgiving and yields delicious results every time.
Essential Ingredients:
- Pickling Cucumbers: 3 medium-sized, such as Kirby or Persian cucumbers. These varieties are ideal due to their thin skin and firm flesh, ensuring a good snap. Wash thoroughly.
- Sweet Onion: ½ a medium sweet onion (like Vidalia). Its mild flavor complements the pickles without overpowering them.
- Hot Water: 1 cup. The heat helps dissolve the sugar and salt quickly, forming a cohesive brine.
- White Vinegar: 1 cup. The essential acidic base for pickling.
- Granulated Sugar: ½ cup. Balances the tartness of the vinegar, giving a delightful sweet-sour profile. For a tarter pickle, reduce to ¼ cup.
- Kosher Salt: 1 tablespoon. Enhances flavor and contributes to the pickling process.
- Fresh Cracked Black Pepper: ½ teaspoon. Adds a subtle layer of seasoning.
Equipment You'll Need:
- Heat-Proof Jar: A clean, airtight, wide-mouth quart-sized (or larger) jar with a lid. Mason jars are perfect.
- Mandoline Slicer (Recommended): For uniformly thin slices of cucumber and onion, which ensures even pickling and a professional texture. Exercise extreme caution when using a mandoline, always using the safety guard to protect your fingers.
- Sharp Kitchen Knife and Cutting Board: If you don't have a mandoline, a sharp knife will work well for thin slices.
- Measuring Cups and Spoons: For precise ingredient quantities.
Step-by-Step Instructions:
- Prepare Your Vegetables: Carefully slice your cucumbers and sweet onion as thinly as possible. The thinner the slices, the quicker and more effectively they will absorb the brine flavors. A mandoline is highly recommended for achieving consistent, paper-thin results.
- Craft the Brine: In your heat-proof jar, combine the hot water, white vinegar, granulated sugar, kosher salt, and fresh cracked black pepper. Secure the lid tightly and shake vigorously for about 30-60 seconds, or until the sugar and salt are completely dissolved. You'll see the liquid become clear.
- Combine & Submerge: Carefully add the thinly sliced cucumbers and onions to the jar with the brine. Using a spoon or your clean hands, gently press the vegetables down into the brine. It's crucial that all the cucumber and onion slices are fully submerged beneath the liquid. This prevents spoilage and ensures every piece gets properly pickled. If necessary, you can place a small, clean weight (like a fermentation weight or even a small, clean rock wrapped in plastic wrap) on top to keep them submerged.
- Chill for Flavor: Seal the jar tightly and place it in the refrigerator. While you can technically sample them after a few hours, the flavors truly meld and deepen after at least 24 hours. For optimal taste and crispness, let them chill for a full day before enjoying.
Beyond the Basic Brine: Customizing Your Refrigerator Pickles
The beauty of
refrigerator pickles lies not just in their simplicity, but also in their incredible versatility. Once you've mastered the basic recipe, the possibilities for flavor customization are endless. Don't be afraid to experiment and create a pickle that's uniquely yours!
Unlock Flavor: Customize Your Refrigerator Pickles & Beyond and consider these exciting variations:
Vinegar Swaps for Different Notes:
- Apple Cider Vinegar: Adds a fruity, slightly tangy depth.
- White Wine Vinegar: Offers a more delicate, complex acidity.
- Sherry Vinegar: Imparts a rich, nutty, and slightly sweet undertone.
Aromatic Adventures:
- Different Onions: Swap sweet onion for sharp white onions, vibrant red onions (which also dye the pickles a beautiful pink!), or mild, delicate shallots.
- Garlic: Add a few cloves of smashed or thinly sliced garlic for a classic, pungent kick.
Spice It Up:
Elevate your pickles with whole spices, which infuse the brine with their distinct aromas and flavors.
- Mustard Seeds: A quintessential pickle spice, adding a sharp, piquant note.
- Coriander Seeds: Contributes a citrusy, floral, and slightly sweet flavor.
- Black Peppercorns: For a more robust peppery warmth.
- Red Pepper Flakes: If you love a little heat, add a pinch or two for a fiery kick.
- Fennel Seeds: Offers a subtle licorice-like sweetness and aroma.
Fresh Herb Infusion:
A few sprigs of fresh herbs can transform the character of your pickles.
- Fresh Dill: The quintessential pickle herb, providing a bright, grassy, and slightly anisy flavor.
- Tarragon: Adds a sophisticated licorice-like and peppery note.
- Parsley: For a fresh, green, and slightly earthy taste.
Beyond Cucumbers: Pickling Other Vegetables:
The same effortless brining method can be applied to a variety of other vegetables, opening up a world of quick pickled delights. Ensure they are thinly sliced for optimal results.
- Carrots: Sweet and crunchy, perfect for a vibrant side.
- Radishes: Turn from peppery to pleasantly tangy with a beautiful rosy hue.
- Zucchini: A great way to use up garden abundance, offering a tender bite.
- Jalapeños or Red Chili Peppers: For those who crave heat, these make fantastic spicy condiments.
- Bell Peppers: Sliced thinly, they add sweetness and crunch.
Tips for Refrigerator Pickle Perfection & Longevity
While refrigerator pickles are incredibly simple, a few key practices can elevate your batch from good to absolutely outstanding, ensuring maximum crispness, flavor, and shelf life.
- Start with the Freshest Cucumbers: The foundation of a great pickle is a great cucumber. Look for firm, blemish-free cucumbers with vibrant green skin. Avoid any with soft spots or dullness. Consistently sized cucumbers will also help ensure even pickling. Freshness directly translates to crispness in the finished product.
- Achieve Uniform Thin Slices: Whether using a mandoline or a sharp knife, aim for slices of consistent thickness (ideally ⅛ to ¼ inch). Uniformity allows the brine to penetrate evenly, resulting in perfectly pickled pieces with the same texture and flavor.
- Always Submerge: This is critical! Any vegetable not fully submerged in the pickling brine is exposed to air and risks spoilage. Make sure your cucumbers and onions are completely covered. If needed, use a small plate or weight to keep them pressed down.
- Adjust Sweetness to Taste: The base recipe provides a balanced sweet-sour flavor. If you prefer a more tart pickle, reduce the granulated sugar to ¼ cup. For an even sweeter profile, you can increase it slightly, but be mindful not to make it syrupy.
- Storage is Key: Always store your homemade refrigerator pickles in an airtight jar or container in the refrigerator. This is not just for freshness but also for safety. They are not shelf-stable like traditional canned goods.
- Optimal Freshness: For the best flavor and texture, consume your refrigerator pickles within 3-4 weeks. While they might still be safe to eat beyond this period, their crispness and vibrant taste will begin to diminish.
Serving Suggestions
Once your refrigerator pickles are ready, the ways to enjoy them are limitless! They are fantastic as a refreshing side dish at cookouts, pairing perfectly with rich dishes like pulled pork, shredded BBQ chicken, or hearty sandwiches. Add them to burgers and hot dogs for a burst of tangy crunch, chop them into salads, or simply snack on them straight from the jar for a guilt-free, flavorful bite. They also make a wonderful addition to charcuterie boards or as a vibrant garnish for various entrees.
Conclusion
Making your own homemade
refrigerator pickles is a truly rewarding experience that proves delicious results don't require extensive effort. In just 10 minutes of prep, you can create crisp, zesty, and incredibly fresh pickles that far surpass anything store-bought. This simple, no-canning method empowers you to customize flavors, experiment with different vegetables, and always have a vibrant, tangy condiment on hand. So, grab your cucumbers, prepare your brine, and get ready to enjoy the satisfying crunch of your very own quick and easy refrigerator pickles – your taste buds will thank you!